How To Align the Sensors on a Garage Door Step by Step
Garage door not moving?
Before you panic about replacing it, take a breath — nine times out of ten, the issue is misaligned sensors.
These small safety devices have a big impact on protecting your family and property. When they’re working correctly, you barely notice them. When they’re not? You definitely do.
In this guide, we’ll show you how to align garage door sensors step by step, so you can get your day back on track.
The Role of Garage Door Sensors and Why Their Alignment Matters
Positioned near the bottom of each side of your garage door frame, your sensors act as an invisible safety net. They create an infrared beam across the opening that detects anything in the door’s path — from your child’s bike to the family cat.
When the beam detects something, the sensors immediately signal the door to stop or reverse.
If your sensors are misaligned, your door may:
Stop mid-close
Reverse unexpectedly
Refuse to close at all
For South Florida homeowners, functional garage doors are especially important during hurricane season. The garage is often the largest opening on your home’s exterior, and the door must be able to fully close and lock properly.
Florida’s strict building codes — overseen by the Florida Building Code — require permits for garage door replacement and service to ensure wind resistance and structural safety.
How to Know If Your Garage Door Sensors Are Misaligned
You may have misaligned sensors if:
Your garage door closes halfway then reverses
You see blinking lights on one or both sensor units
Before starting, handle all wiring carefully — especially on older systems — and avoid forcing damaged brackets.
1. Cut the Power
Unplug your opener or turn off the breaker. This prevents accidental movement.
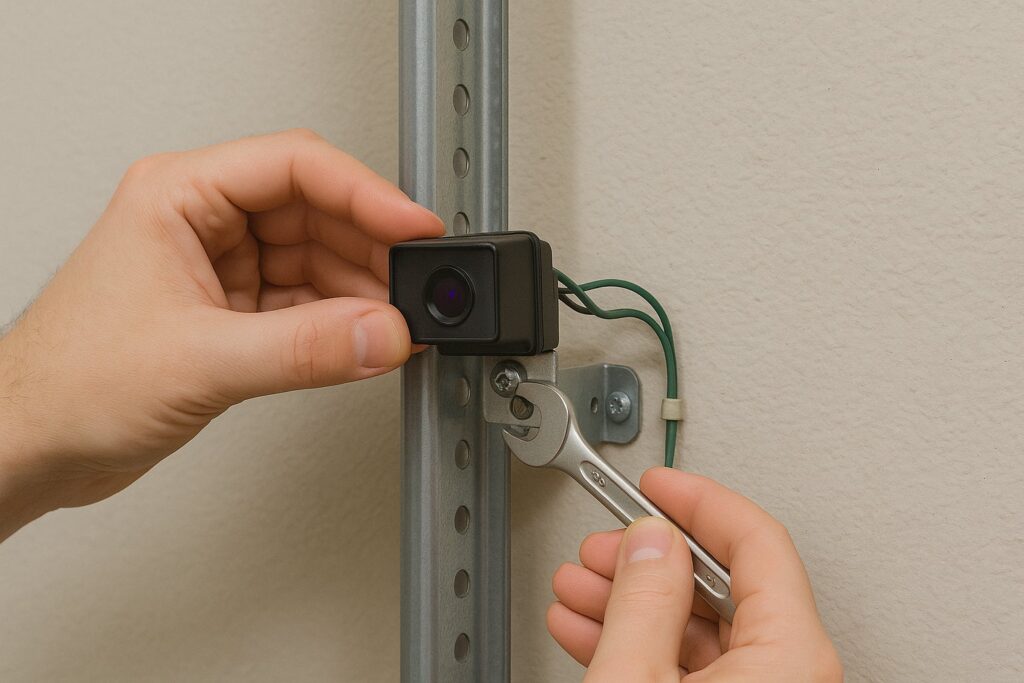
2. Locate the Sensors and Inspect the Brackets
Sensors are typically 4–6 inches above the floor on the inside of the tracks. Check that the brackets aren’t bent or loose.
3. Clean the Sensor Lenses
Use a lint-free cloth to wipe away dust, dirt, or spider webs. (You’d be surprised how often this single step solves the issue.)
4. Loosen the Brackets and Align the Sensors
Loosen the screws and adjust the sensors. Using string as a guide helps ensure both sensors are level with each other.
5. Double-Check Alignment with a Level
Place a bubble level against each sensor so they’re perfectly aligned and facing each other.
6. Tighten and Test
Hold sensors in place, tighten the screws, and restore power. Both LEDs should glow steadily.
If not, make tiny micro-adjustments — LiftMaster sensors are especially sensitive.
Tips for How to Align Garage Door Sensors from LiftMaster
LiftMaster systems offer excellent diagnostic feedback:
Green and Amber LEDs
Green light = receiving sensor aligned
Amber/yellow light = sending sensor aligned
Blinking = misalignment
Real-Time LED Feedback
The LEDs change instantly as you adjust the sensors — use this to guide accuracy.
High Sensitivity
Even a minor bump can throw alignment off. If alignment won’t hold, brackets may be loose or damaged.
If the issue persists, it may be related to springs or tracks. View our related guide: Broken Garage Door Springs
When to Call a Professional
If your sensors still blink after adjusting them — or you notice:
Damaged brackets
Frayed wiring
Opener issues
Door imbalance
We’re here to help.
Call us at 954-942-8550 or send us a message to schedule your service visit.
Your Trusted South Florida Garage Door Experts Since 1966
At Allied Doors, we’re dedicated to keeping your garage door operating safely — from installations to hurricane preparation. Family-owned and proudly serving Florida from the Keys to Vero Beach, we’re more than a service provider — we’re your family in the garage door business.